Achieving truly detailed and diagnostically useful 3D images of internal organs goes far beyond simply converting 2D scans. The key lies in mastering the post-processing pipeline. This involves leveraging superior source data from spectral CT, applying AI-driven segmentation with rigorous human validation, and selecting the optimal rendering technique—like volume or cinematic rendering—for the specific clinical question, transforming raw data into a decisive surgical and diagnostic tool.
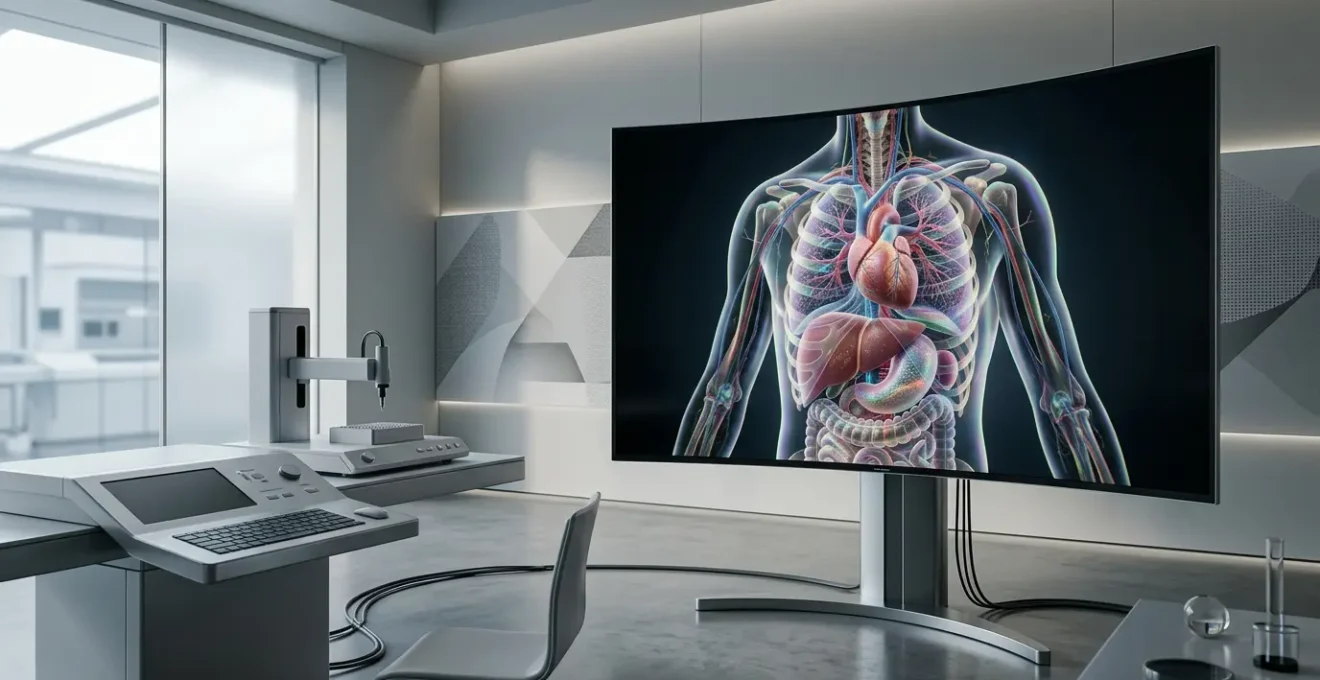
In modern medicine, radiologists and surgical planners are inundated with imaging data. Standard CT and MRI scans provide a wealth of information, yet the leap from a series of 2D slices to a comprehensive, intuitive understanding of complex 3D anatomy remains a significant challenge. The conventional approach to 3D reconstruction often produces models that are visually impressive but lack the granular detail needed for confident diagnosis or precise pre-operative planning. We have the data, but we often lack the definitive clarity.
Many discussions about 3D imaging revolve around basic software capabilities or the general benefits of seeing anatomy in three dimensions. However, these conversations miss the most critical point. The true power of advanced 3D reconstruction doesn’t come from a single button-press. It emerges from a series of strategic choices made during the post-processing stage. But what if the key to unlocking unprecedented detail wasn’t just about having a 3D model, but about how that model is built, refined, and visualized?
This article provides a specialist’s perspective on this crucial post-processing pipeline. We will dissect the key decisions that elevate a standard 3D model into a high-fidelity diagnostic instrument. We’ll explore how to harness spectral imaging, automate segmentation effectively, select the right rendering mode for vascular mapping, and overcome common pitfalls like motion artifacts. Finally, we’ll examine the tangible clinical and operational benefits, demonstrating how mastering this process directly translates to improved patient outcomes.
The following sections break down this advanced workflow, offering a clear roadmap for any clinician looking to move beyond basic visualization and unlock the full potential of their imaging data.
Summary: How to Obtain Detailed Images of Internal Organs Using Advanced 3D Reconstruction?
- Why Spectral Imaging Reveals Lesions Invisible on Standard Scans?
- How to Automate Organ Segmentation for Surgical Planning in Under 10 Minutes?
- Volume Rendering vs. Surface Shading: Which Is Better for Vascular Mapping?
- The Motion Correction Mistake That Blurs Cardiac Imaging Results
- How to Share Heavy DICOM Files with Remote Specialists Without Quality Loss?
- How to Convert CT Scans into Printable STL Files Without Losing Detail?
- Radiology or Pathology: Which Department Benefits Most from Early AI Adoption?
- How Medical Bio-model 3D Printing Reduces Operating Room Time by 20%?
Why Spectral Imaging Reveals Lesions Invisible on Standard Scans?
The quest for diagnostic clarity begins with the source data. While conventional CT provides excellent morphological information, its ability to differentiate tissues with similar densities is limited. This is where spectral (or dual-energy) CT represents a paradigm shift. Instead of capturing a single, averaged image, it acquires data at two different energy levels. This process allows for material decomposition, separating materials like calcium, iodine, and soft tissue based on their unique X-ray attenuation properties.
This capability is not just an incremental improvement; it unlocks a new layer of diagnostic information. For example, in liver imaging, a 3D THERMO-SCAN methodology combining spectral CT with infrared thermal data can create multimodal 3D models. Within these models, iodine mapping can precisely highlight tumor perfusion areas that would be completely invisible on standard scans, enabling more accurate treatment planning without requiring additional contrast doses. This is a clear demonstration of enhanced diagnostic utility.
The impact on reconstruction accuracy is profound. By providing fundamentally richer data, spectral CT lays a superior foundation for the 3D model. In applications like differentiating types of kidney stones, research shows that 3D reconstruction accuracy improved by 94% using spectral CT data for material decomposition compared to conventional CT. This isn’t just a better picture; it’s a more truthful and clinically decisive representation of the underlying pathology.
Ultimately, spectral imaging provides the raw ingredients for a more intelligent 3D model. It moves beyond simple anatomy to reveal functional and compositional information, allowing post-processing software to build reconstructions that answer specific clinical questions with far greater confidence.
How to Automate Organ Segmentation for Surgical Planning in Under 10 Minutes?
Once you have high-quality source data, the next critical step in the post-processing pipeline is segmentation—the process of digitally isolating specific organs or structures of interest. Manually, this can be a painstaking, time-consuming task. However, the integration of deep learning models, particularly Convolutional Neural Networks (CNNs), has revolutionized this workflow, making it possible to achieve complex segmentations in less than 10 minutes for many standard cases.
Modern AI-enabled platforms like 3D Slicer, often with integrations like the MONAI framework, come with pre-trained models that can automatically identify and delineate organs like the liver, kidneys, or vascular networks directly from DICOM data. The software effectively creates a « mask » for each structure, which is the foundation for the 3D model. This automation dramatically accelerates the creation of patient-specific models for surgical planning.
However, relying on full automation without oversight is a critical mistake. The most robust workflow is a Clinical Validation Loop, where the radiologist or technician remains « human-in-the-loop. » The AI provides the initial, high-speed segmentation, often with a confidence score for each area. The expert’s role then shifts to reviewing and refining, focusing their attention on areas where the AI’s confidence is low or where complex pathology might confuse the algorithm. This combination of AI speed and human expertise ensures both efficiency and clinical accuracy.
Action Plan: The Human-in-the-Loop Validation Protocol
- Load DICOM data into an AI-enabled platform like 3D Slicer with MONAI integration.
- Apply automatic segmentation using pre-trained deep learning models (CNNs).
- Review AI confidence scores, focusing on areas below 85% certainty.
- Use manual correction tools (brush, eraser) for AI failure points.
- Validate dimensional accuracy against original DICOM measurements in the PACS viewer.
Volume Rendering vs. Surface Shading: Which Is Better for Vascular Mapping?
After segmentation, the next choice is how to visualize the data. This isn’t a one-size-fits-all decision. The rendering technique you choose directly impacts the model’s diagnostic utility. For vascular mapping, the two most common techniques are Volume Rendering (VR) and Surface Shaded Display (SSD), but newer methods like Cinematic Rendering offer even more options. Each has distinct advantages depending on the clinical question.
Surface Shading (SSD) creates a solid-looking, opaque model of the segmented structure’s surface. Its primary advantage is creating clear, sharp boundaries, which is ideal for taking precise measurements, such as sizing a vessel for a pre-surgical stent. However, it discards all internal data, providing no information about what’s inside the structure. Volume Rendering (VR), by contrast, assigns color and opacity to every voxel in the dataset. This creates a semi-transparent, volumetric image that shows depth, overlap, and internal structures. It is superior for visualizing diffuse disease like atherosclerosis, where understanding the internal plaque burden is crucial.
As Brian Mitzman, MD, notes in a CTSNet tutorial, the application of these techniques is becoming standard practice:
Advanced imaging and reconstruction of CT scans is now routinely utilized in many surgical specialties, and in cardiothoracic surgery specifically, it is commonly utilized in structural heart programs.
– Brian Mitzman, MD, CTSNet Tutorial on 3D Reconstruction
The choice extends beyond this basic pair. Newer techniques like Cinematic Rendering use complex light transport physics to create photorealistic images, which excel at assessing complex structures like aneurysm rupture risks. 4D Flow integration adds a temporal dimension, visualizing blood flow dynamics, turbulence, and wall shear stress. The following table from a comparative analysis of rendering techniques summarizes the ideal use cases.
| Technique | Best Use Case | Advantages | Processing Time |
|---|---|---|---|
| Volume Rendering | Diffuse atherosclerosis visualization | Shows depth and internal structures | Real-time with GPU |
| Surface Shading | Pre-surgical stent sizing | Precise measurements, clear boundaries | < 5 minutes |
| Cinematic Rendering | Aneurysm rupture assessment | Photorealistic detail, light transport simulation | 10-15 minutes |
| 4D Flow Integration | Blood flow dynamics | Shows turbulence, wall shear stress | 20-30 minutes |
The Motion Correction Mistake That Blurs Cardiac Imaging Results
One of the most significant challenges in creating sharp, detailed 3D reconstructions, especially in cardiac and thoracic imaging, is motion. Artifacts from patient movement, breathing, or the cardiac cycle itself can introduce blurring and ghosting, severely degrading the model’s quality and diagnostic value. The common mistake is to accept these artifacts as an unavoidable limitation of the scan, when in fact, advanced post-processing software can retrospectively correct for them.
Ignoring motion artifacts undermines the entire purpose of high-resolution imaging. Flaws in the 3D reconstruction can obscure fine details of the coronary arteries or misrepresent the true shape and size of a valve, leading to flawed surgical planning. The integrity of the voxel data is compromised, and the resulting model is no longer a faithful representation of the patient’s anatomy.
The solution lies in sophisticated motion compensation algorithms. ECG-gated acquisition at the scanner is the first line of defense, but post-processing provides a powerful second chance. These software tools employ non-rigid image registration algorithms to analyze the DICOM series, detect motion between slices or phases, and digitally warp the images back into alignment. This effectively « un-blurs » the data before the 3D model is even generated. This is particularly effective for cardiac imaging, as research on advanced cardiac imaging reconstruction shows that 4D model-based motion compensation can reduce coronary motion artifacts by 87%.
Case Study: AI-Powered Retrospective Motion Correction
Motion artifacts from various sources, including patient movement, orthodontic retainers, and cardiac motion, can generate significant flaws in 3D reconstructions. To address this, advanced software now employs non-rigid image registration algorithms to retrospectively correct motion-corrupted scans. For instance, specialized smoothing functions within software like 3-Matic Medical can be applied after registration to eliminate these imperfections, restoring the diagnostic quality of the final 3D model.
How to Share Heavy DICOM Files with Remote Specialists Without Quality Loss?
Creating a high-fidelity 3D model is only half the battle. Its value is fully realized when it can be shared and reviewed collaboratively by specialists, regardless of their location. However, raw DICOM datasets are notoriously large, often running into gigabytes, making them impractical to share via email or conventional file-sharing services. The challenge is to provide remote access without sacrificing image quality or interactive performance.
The traditional method of burning images to a CD is slow, insecure, and inefficient. The modern solution is a server-side rendering workflow, leveraging cloud-based platforms. In this model, the heavy DICOM dataset is uploaded to a secure cloud server. The computationally intensive rendering of the 3D model happens on the server, and only the resulting lightweight visual stream is sent to the specialist’s device. This allows for real-time interaction with complex 3D models through a standard web browser, even on a tablet or laptop, without needing to download the entire dataset.
To make this efficient, a combination of protocols and compression is used. DICOMweb and WADO-RS protocols are designed for web-based access to imaging data. Furthermore, « clinically acceptable » lossy compression, such as JPEG 2000, can be applied to reduce file sizes by 70-80% while preserving critical diagnostic information. The workflow for secure and efficient sharing generally involves these steps:
- Upload the complete DICOM dataset to a cloud-based platform with server-side rendering capabilities.
- Configure DICOMweb/WADO-RS protocols for streamlined web-based access.
- Apply JPEG 2000 ‘clinically acceptable’ lossy compression, which can reduce file size significantly.
- Generate lightweight ‘derived object’ 3D models with embedded annotations for quick review.
- Share a secure access link that allows specialists to interact with the model in real-time via browser-based streaming.
How to Convert CT Scans into Printable STL Files Without Losing Detail?
The utility of a 3D reconstruction extends beyond the screen. Converting the digital model into a physical, 3D-printed bio-model offers surgeons a tactile tool for preoperative planning and simulation. The standard file format for 3D printing is STL (stereolithography), but the conversion from a segmented medical model to a high-quality, printable STL file is a process fraught with potential for detail loss.
A simple export is not enough. The key is a rigorous mesh validation workflow. An STL file is a mesh of interconnected triangles that defines the surface of the object. For a medical model to be accurate and printable, this mesh must be « watertight » and free of errors. Common problems include non-manifold errors (where edges are shared by more than two faces), holes in the mesh, and self-intersecting surfaces, all of which can cause print failures or inaccuracies in the final model.
Specialized mesh editing software, such as Meshmixer or Netfabb, is essential for this validation step. After exporting the segmented model from a platform like 3D Slicer, the STL file is imported into one of these tools for inspection and repair. Another critical consideration is structural integrity, especially for delicate vascular or bone structures. A « shelling » technique is often applied to give thin walls a minimum thickness (e.g., 1.5mm) to ensure they can be printed successfully. The final and most important step is cross-referencing critical measurements on the digital mesh against the original DICOM data in a PACS viewer to guarantee dimensional accuracy.
The complete workflow for creating a print-ready file includes:
- Export the segmented model from software like 3D Slicer in STL or OBJ format.
- Import the file into mesh editing software (e.g., Meshmixer, Netfabb) for validation.
- Check for and repair non-manifold errors, holes, and intersecting surfaces.
- Apply a ‘shelling’ technique to ensure thin structures have a minimum wall thickness (e.g., 1.5mm).
- Cross-reference critical measurements against the original DICOM data.
- Perform a test print at a reduced scale to verify the model’s structural integrity.
Radiology or Pathology: Which Department Benefits Most from Early AI Adoption?
The integration of AI into 3D reconstruction workflows is not just a technical enhancement; it’s a strategic shift with profound implications for different clinical departments. While both radiology and pathology are being transformed, the immediate and most comprehensive benefits of AI in 3D reconstruction are currently realized in radiology, which acts as the upstream source for many downstream applications.
Radiology benefits directly at every stage of the post-processing pipeline. AI accelerates segmentation, enables advanced motion correction, and powers new rendering techniques. More importantly, it unlocks the field of radiomics, where AI algorithms can extract vast amounts of quantitative data from images that are invisible to the human eye. In fact, thousands of quantitative features can be extracted from a single 3D reconstruction, offering insights into tumor texture, heterogeneity, and potential response to treatment. This moves radiology from a descriptive discipline to a predictive one.
Pathology, while increasingly digital, is also a major beneficiary, but often in a secondary capacity. Digital pathology leverages whole-slide imaging, but the integration with 3D radiological data is where the true power lies. By co-registering a 3D reconstructed tumor model from a CT scan with a digital pathology slide, clinicians can create a comprehensive map of the disease, correlating macroscopic radiological features with microscopic cellular characteristics. This fusion is invaluable for surgical planning, radiotherapy, and research.
Ultimately, radiology is the primary engine of AI-driven 3D reconstruction benefits because it controls the creation of the foundational data asset. The detailed, AI-enhanced 3D models produced by radiology departments serve as the « source of truth » that then empowers surgical planners, radiotherapists, and pathologists. Early adoption in radiology therefore creates a ripple effect of innovation across the entire clinical enterprise.
Key Takeaways
- Data is Foundation: The quality of the final 3D model is dictated by the source data. Spectral CT provides superior material decomposition for more accurate reconstructions.
- Validate AI Segmentation: Leverage AI for speed in organ segmentation, but always implement a « human-in-the-loop » protocol to validate results and correct errors.
- Match Rendering to a Clinical Task: Choose the rendering technique (Volume, Surface, Cinematic) that best answers the specific clinical question, rather than using a default setting.
- Correct for Motion: Use advanced post-processing algorithms to correct motion artifacts retrospectively, ensuring the highest possible fidelity, especially in cardiac imaging.
How Medical Bio-model 3D Printing Reduces Operating Room Time by 20%?
The culmination of a well-executed 3D reconstruction pipeline is its impact on clinical outcomes. One of the most tangible benefits is the use of patient-specific, 3D-printed bio-models in preoperative planning. By providing surgeons with a 1:1 scale, tactile model of a patient’s unique anatomy, these tools fundamentally change how complex procedures are prepared and executed, leading to significant efficiencies in the operating room (OR).
Holding a physical model of a complex fracture, a tumor encroaching on a vital vessel, or a deformed heart valve allows surgeons to plan instrument approaches, anticipate challenges, and pre-select implant sizes with a level of confidence that is impossible to achieve with 2D images alone. This hands-on simulation removes guesswork and reduces intraoperative decision-making time. The results are quantifiable; studies have shown that using these models can lead to a 20% reduction in operating room time, with additional savings from pre-selecting correctly sized implants and avoiding waste.
The creation of these models is surprisingly accessible. As demonstrated in studies on surgical simulation, there is a minimal learning curve for surgeons to begin using them, and with modern 3D printers, the cost per print is often minimal once the initial hardware investment is made. This makes them highly valuable clinical tools not only for preoperative planning but also for patient education and training the next generation of medical trainees.
This reduction in OR time is more than an efficiency metric; it translates directly to reduced anesthesia time for the patient, lower risk of complications, and significant cost savings for the hospital. It is the ultimate validation of the entire advanced 3D reconstruction process—transforming pixels on a screen into a tool that makes surgery safer, faster, and more predictable.
To leverage these advancements, the next logical step is to evaluate and integrate a robust post-processing software pipeline into your clinical workflow, ensuring your team has the tools to transform imaging data into decisive clinical action.